How to build it
Introduction
The idea of having a sentence-based clock had been floating around in my head for a while.1 I eventually stumbled upon this dataset, and figured I’d build one.
Cue to some building.
Step 1: Gather the necessary parts
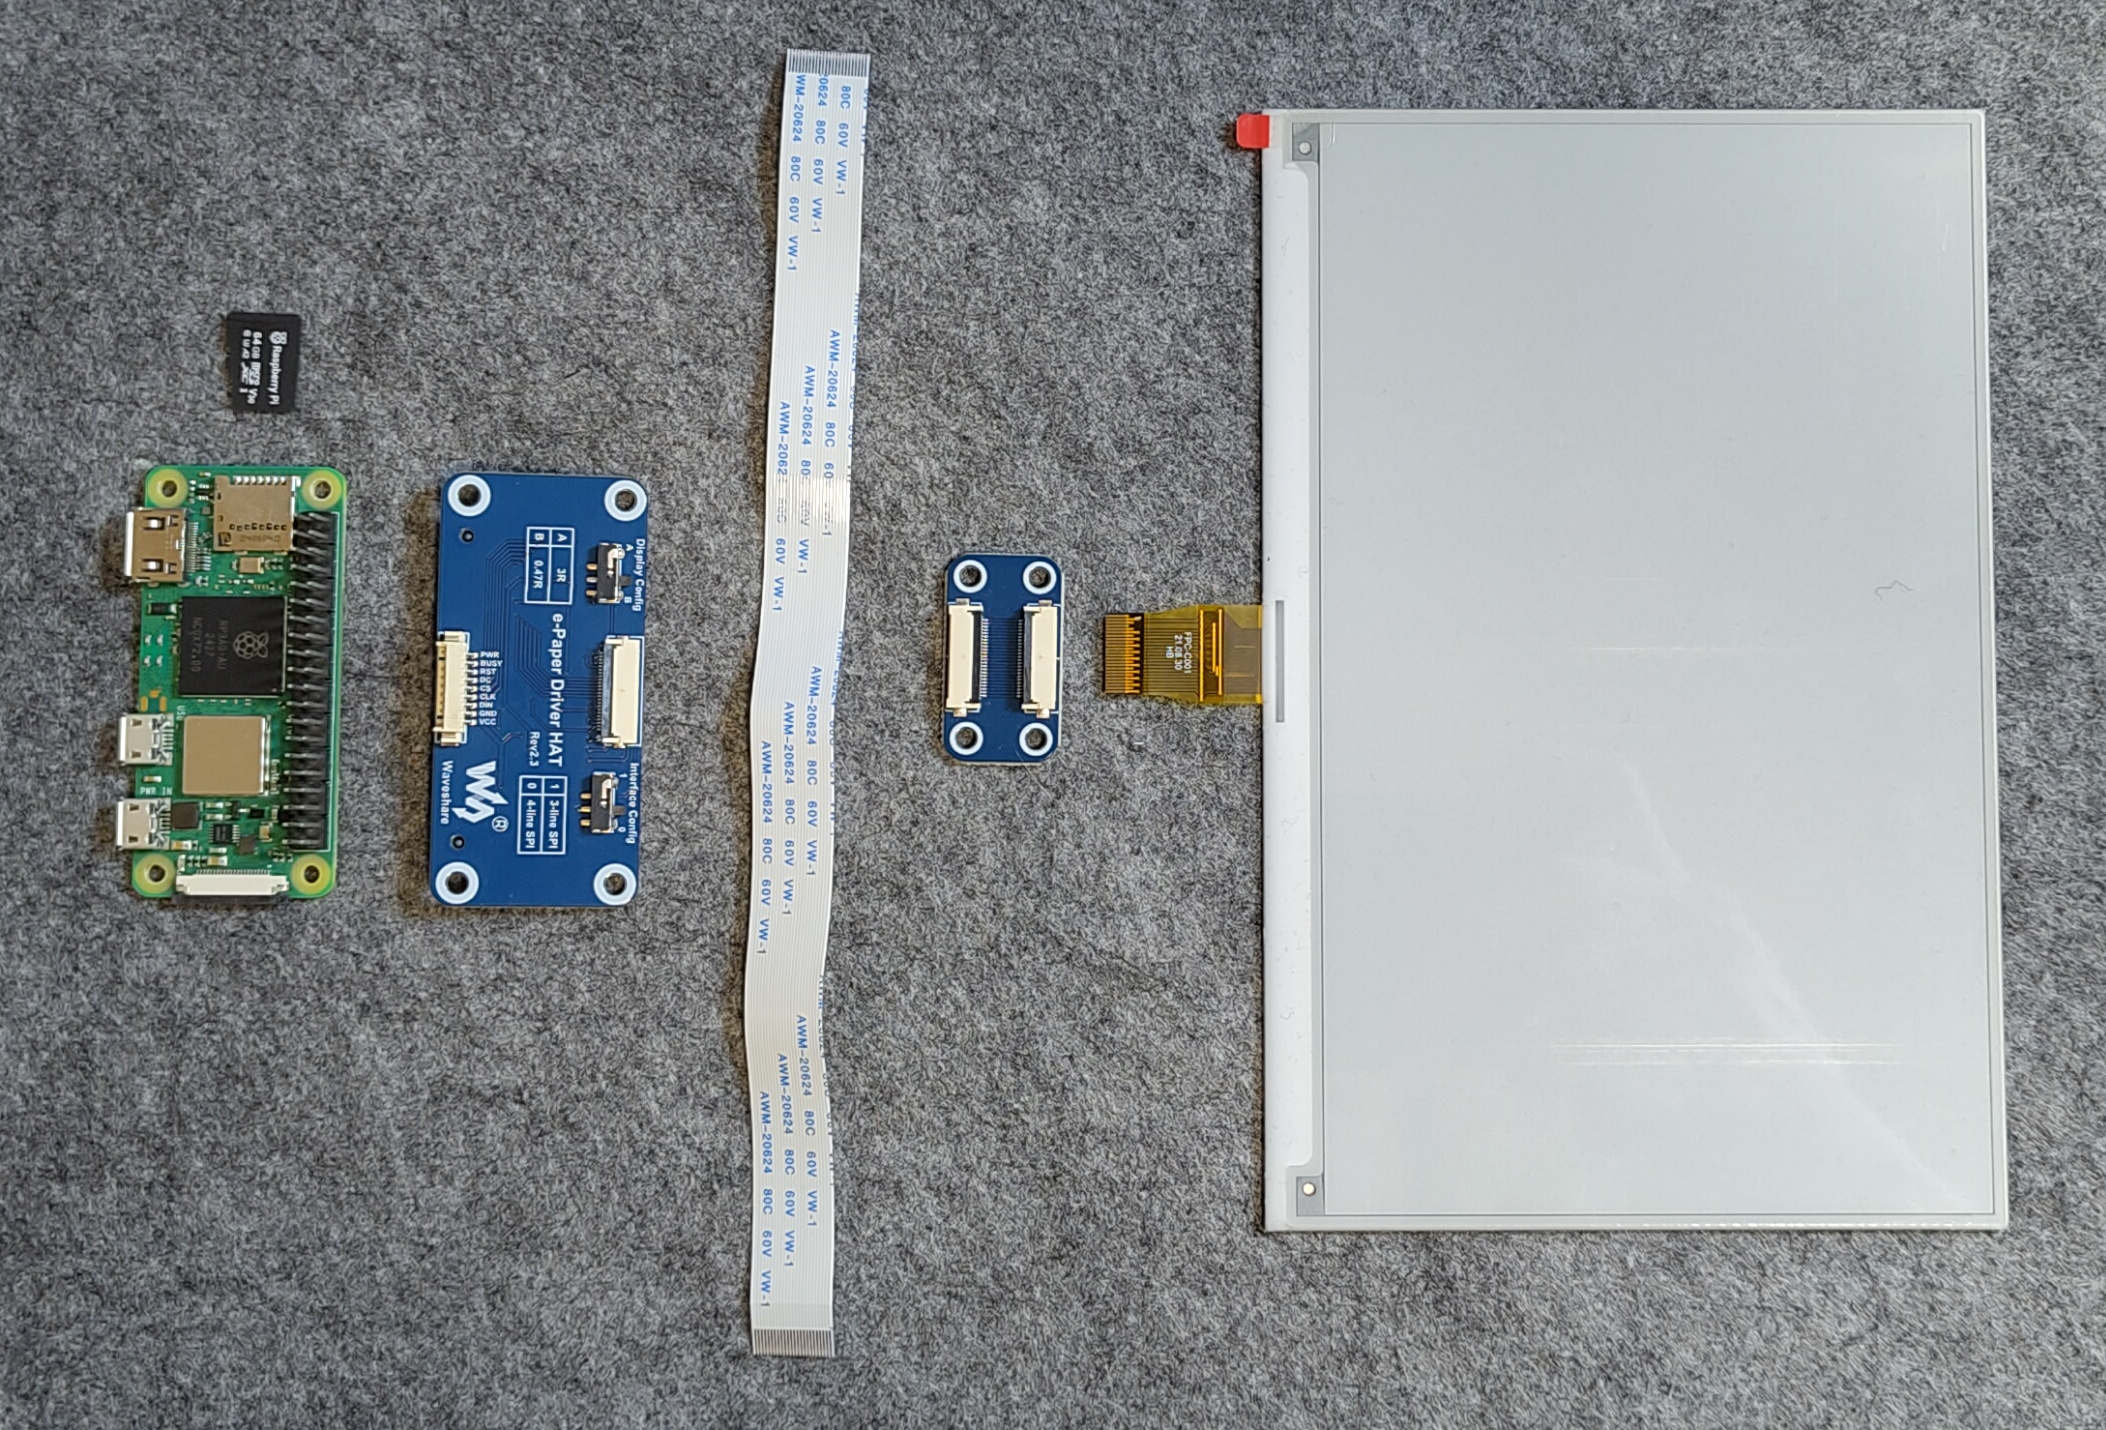
First, I listed all things I’d expect to need – naturally amending that list as I kept on building. Exhaustively:
| Part | Description | Price [CHF] |
|---|---|---|
| Waveshare’s 7.5inch e-Paper screen | Our screen | 60 |
| Raspberry Pi Zero 2W | To drive our screen. | 20 |
| Micro SD card | To house the RPi’s OS. | 10 |
| Waveshare’s 7.5inch e-Paper HAT | To act as a bridge between our RPi and screen. | 20 |
| USB cable Type C | To power our RPi. | 10 |
| 3D-printed case | To house everything. | ~30 |
| Threaded inserts & screws | To hold everything together. | ~3 |
| Female USB-C to Micro USB connector | To avoid using Micro USB. | ~5 |
Step 2: Setup the RPi
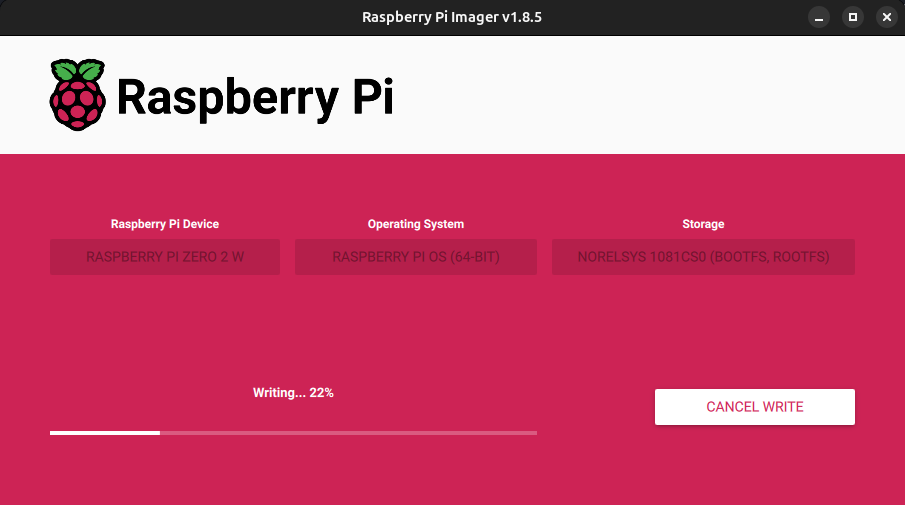
First, I needed to setup the freshly-opened RPI Zero 2W. I flashed it – thereby installing Raspberry Pi OS (64bit), based on Debian – by following the official guide.
Warning
Make sure to flash your WiFi credentials and SSH public key onto the board, allowing you to easily SSH into it later.
Once flashed and booted, the newly-installed RPi will automatically connect to my WiFi.
I can then figure out its local IP address with sudo arp-scan --localnet.

Once I’m in, the first thing to do is to update its software with sudo apt update && sudo apt upgrade.
Making the shell more pleasant
Whenever I install some Debian-based OS, I start by installing oh-my-zsh – along with fzf, zsh-syntax-highlighting and zsh-autosuggestions – making the entire shell-based interaction much more pleasant.
I can now turn off the RPi, and hook the RPi to the HAT, and the HAT to the screen.
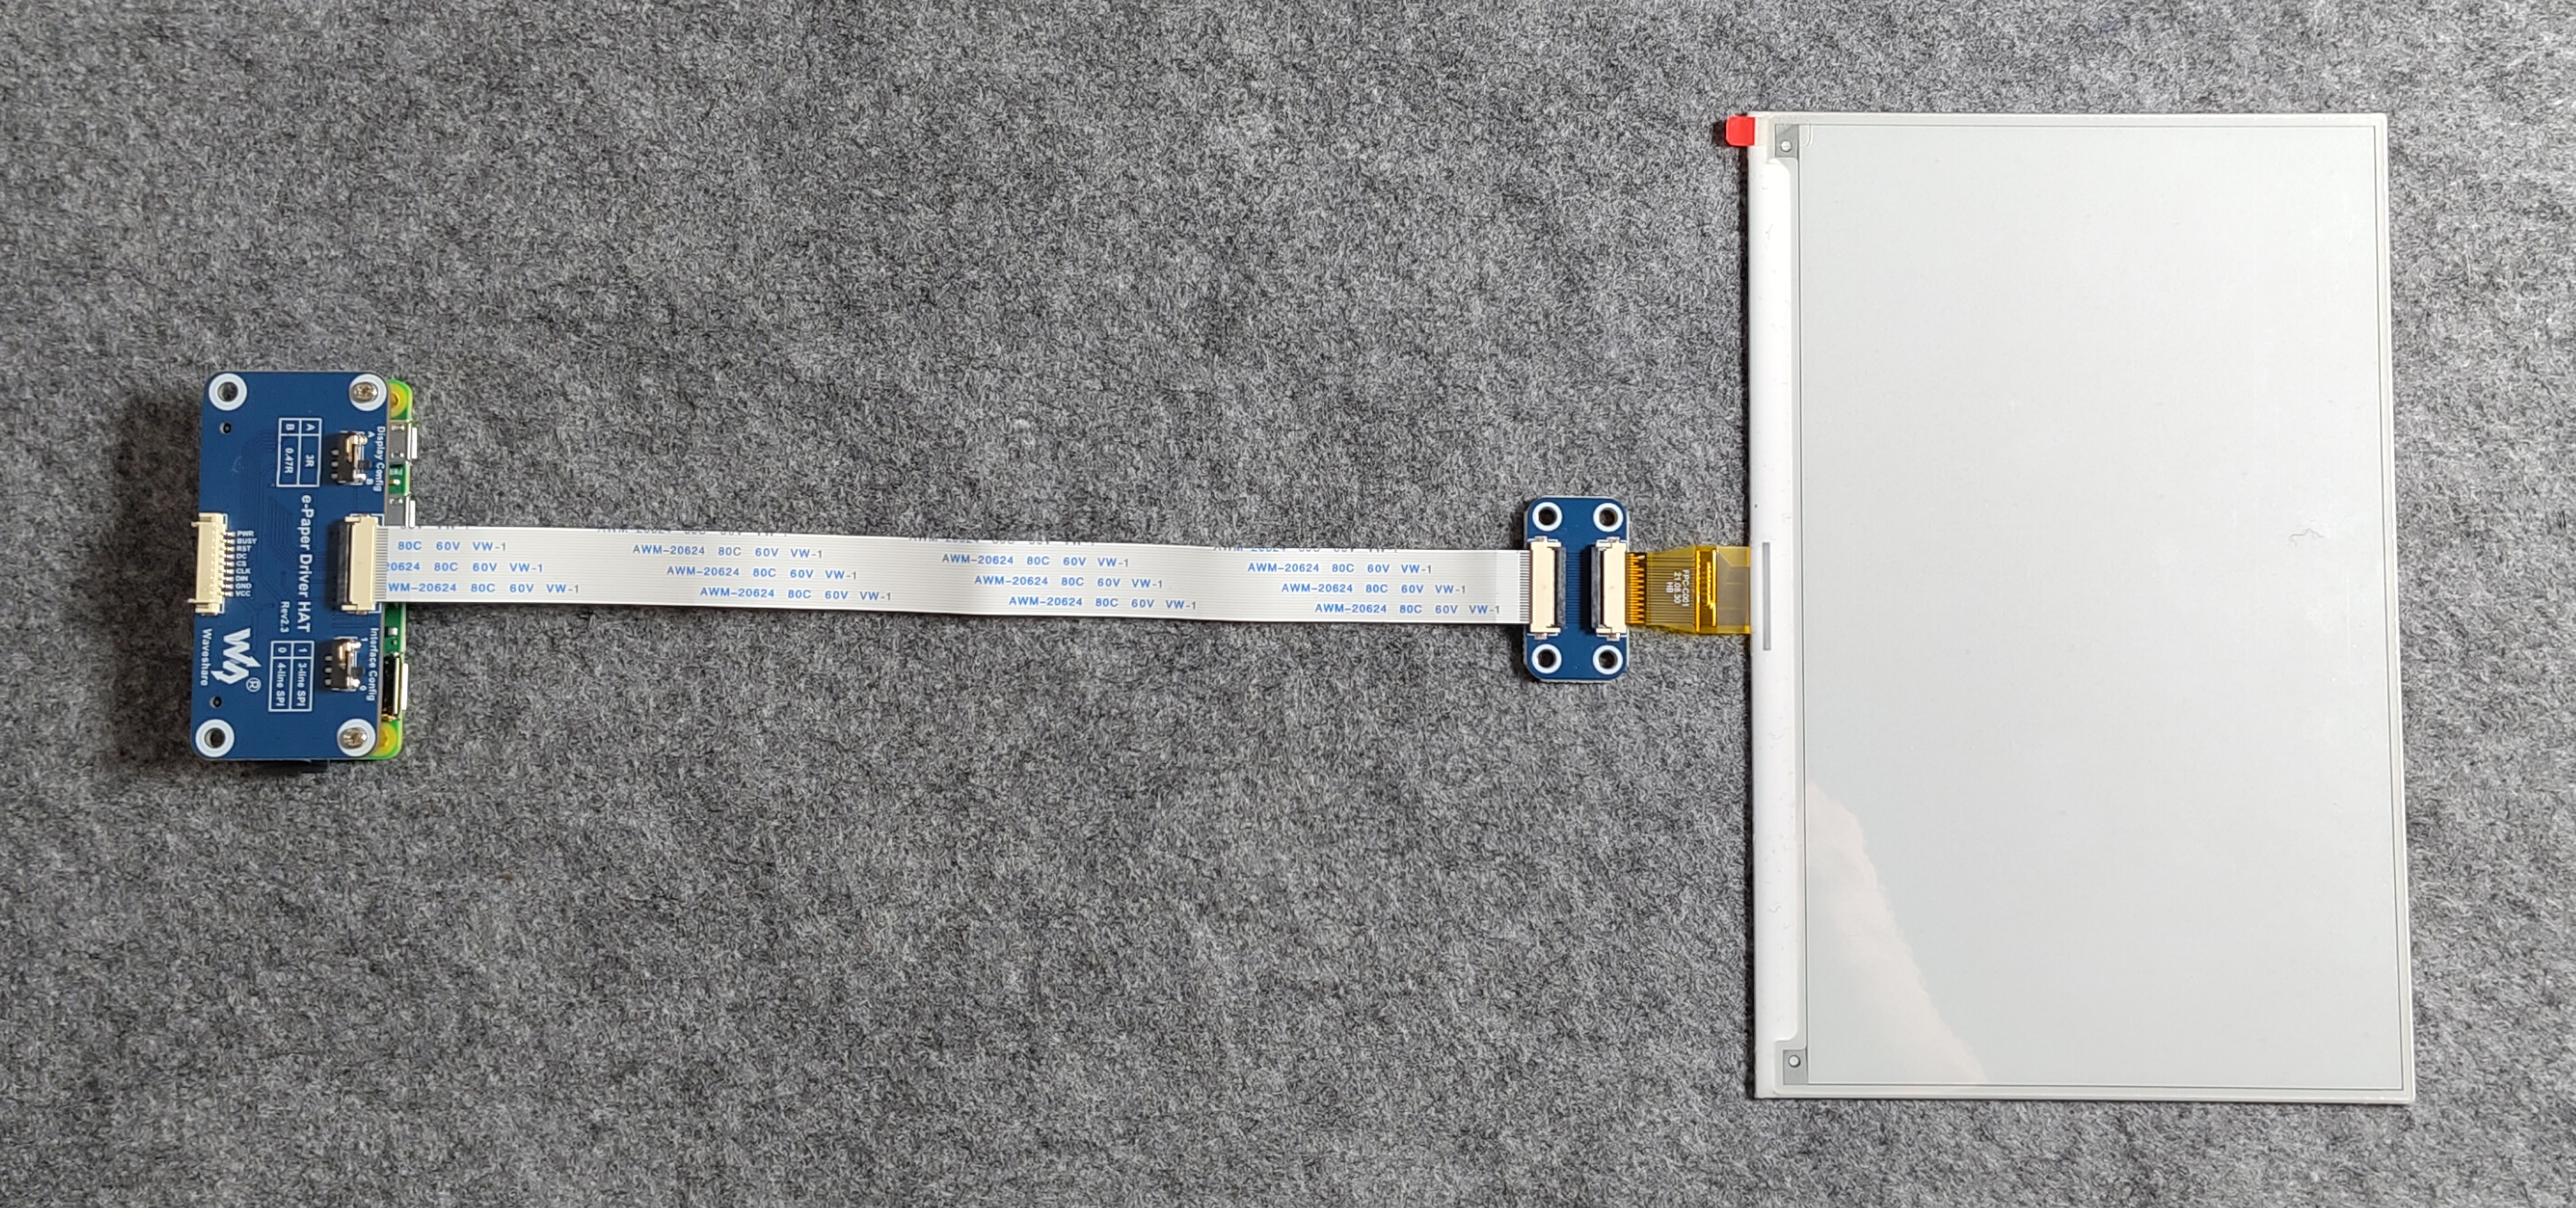
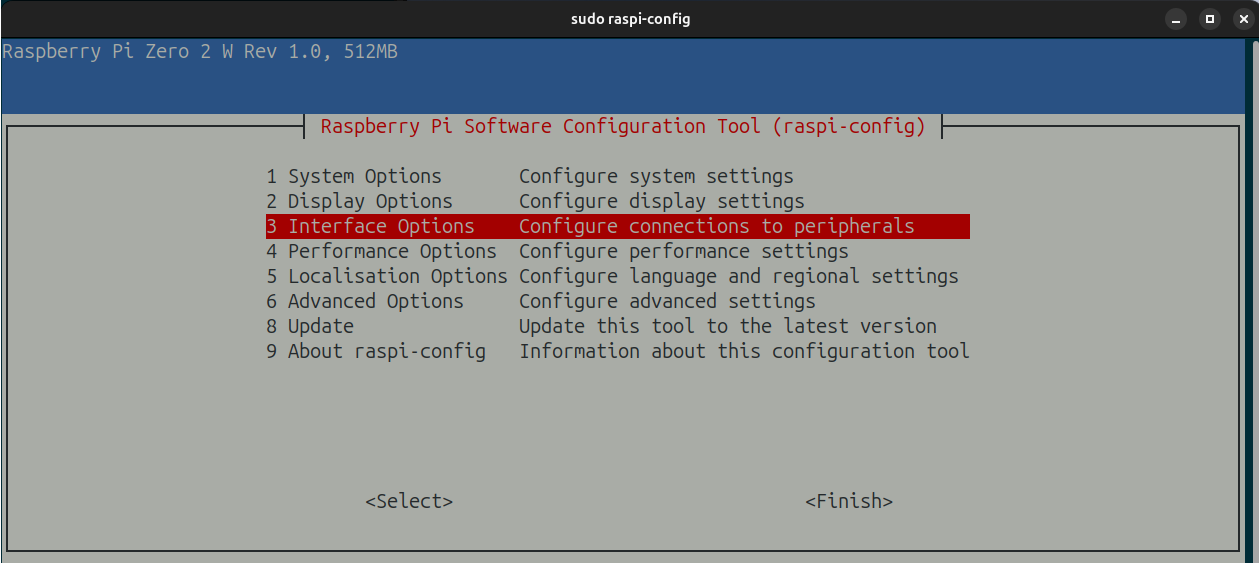
Following Waveshare’s wiki, we need to enable our RPi’s Serial Peripheral Interface (SPI), so that it can talk to our HAT – with sudo raspi-config > Interface Options > SPI.
Step 3: Display something on the screen
Let’s write some code!
Since the code we’ll write will be running directly on our RPi, it’s preferable to write – and test it – directly on our headless board. Luckily, VSCode – and most IDEs – supports this by default, allowing me to edit on my computer the files on our RPi.
Using git on a remote machine
Since I’m versioning my code – via git – and hosting it on GitHub, I’d like to have an easy way of authentifying my remote machine – i.e. my RPi. Deploy keys allow me to do just that, basically enabling my RPi to push/pull from my GitHub repo.
Now e-ink technology is quite peculiar, in that it has a very high refresh time (~4s for our screen), and two types of refresh, namely
- Full-refresh: The entire screen is refreshed at once, quite noticeably.
- Partial-refresh: Only a part of the screen is refreshed at once, discretely. The downside is that a part of the previous image is usually visible, leading to a “dirty-looking” screen after a while.
After diving through Waveshare’s demo codes and Waveshare’s wiki, and struggling to figure out what code was actually needed, I managed to display Hello World onto the screen. The full Python code is available here.
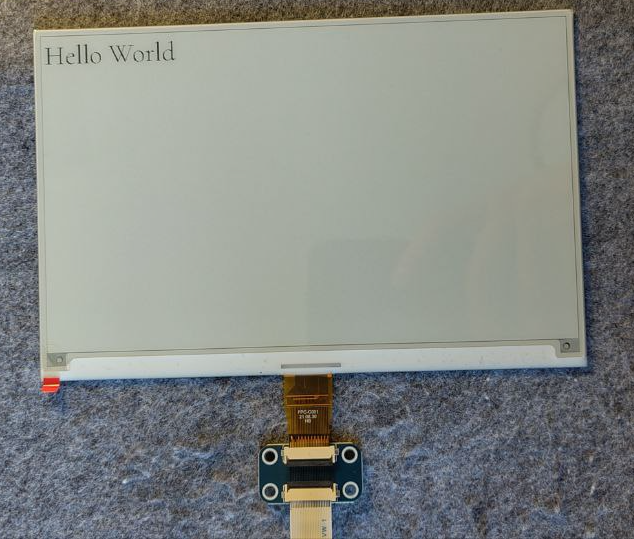
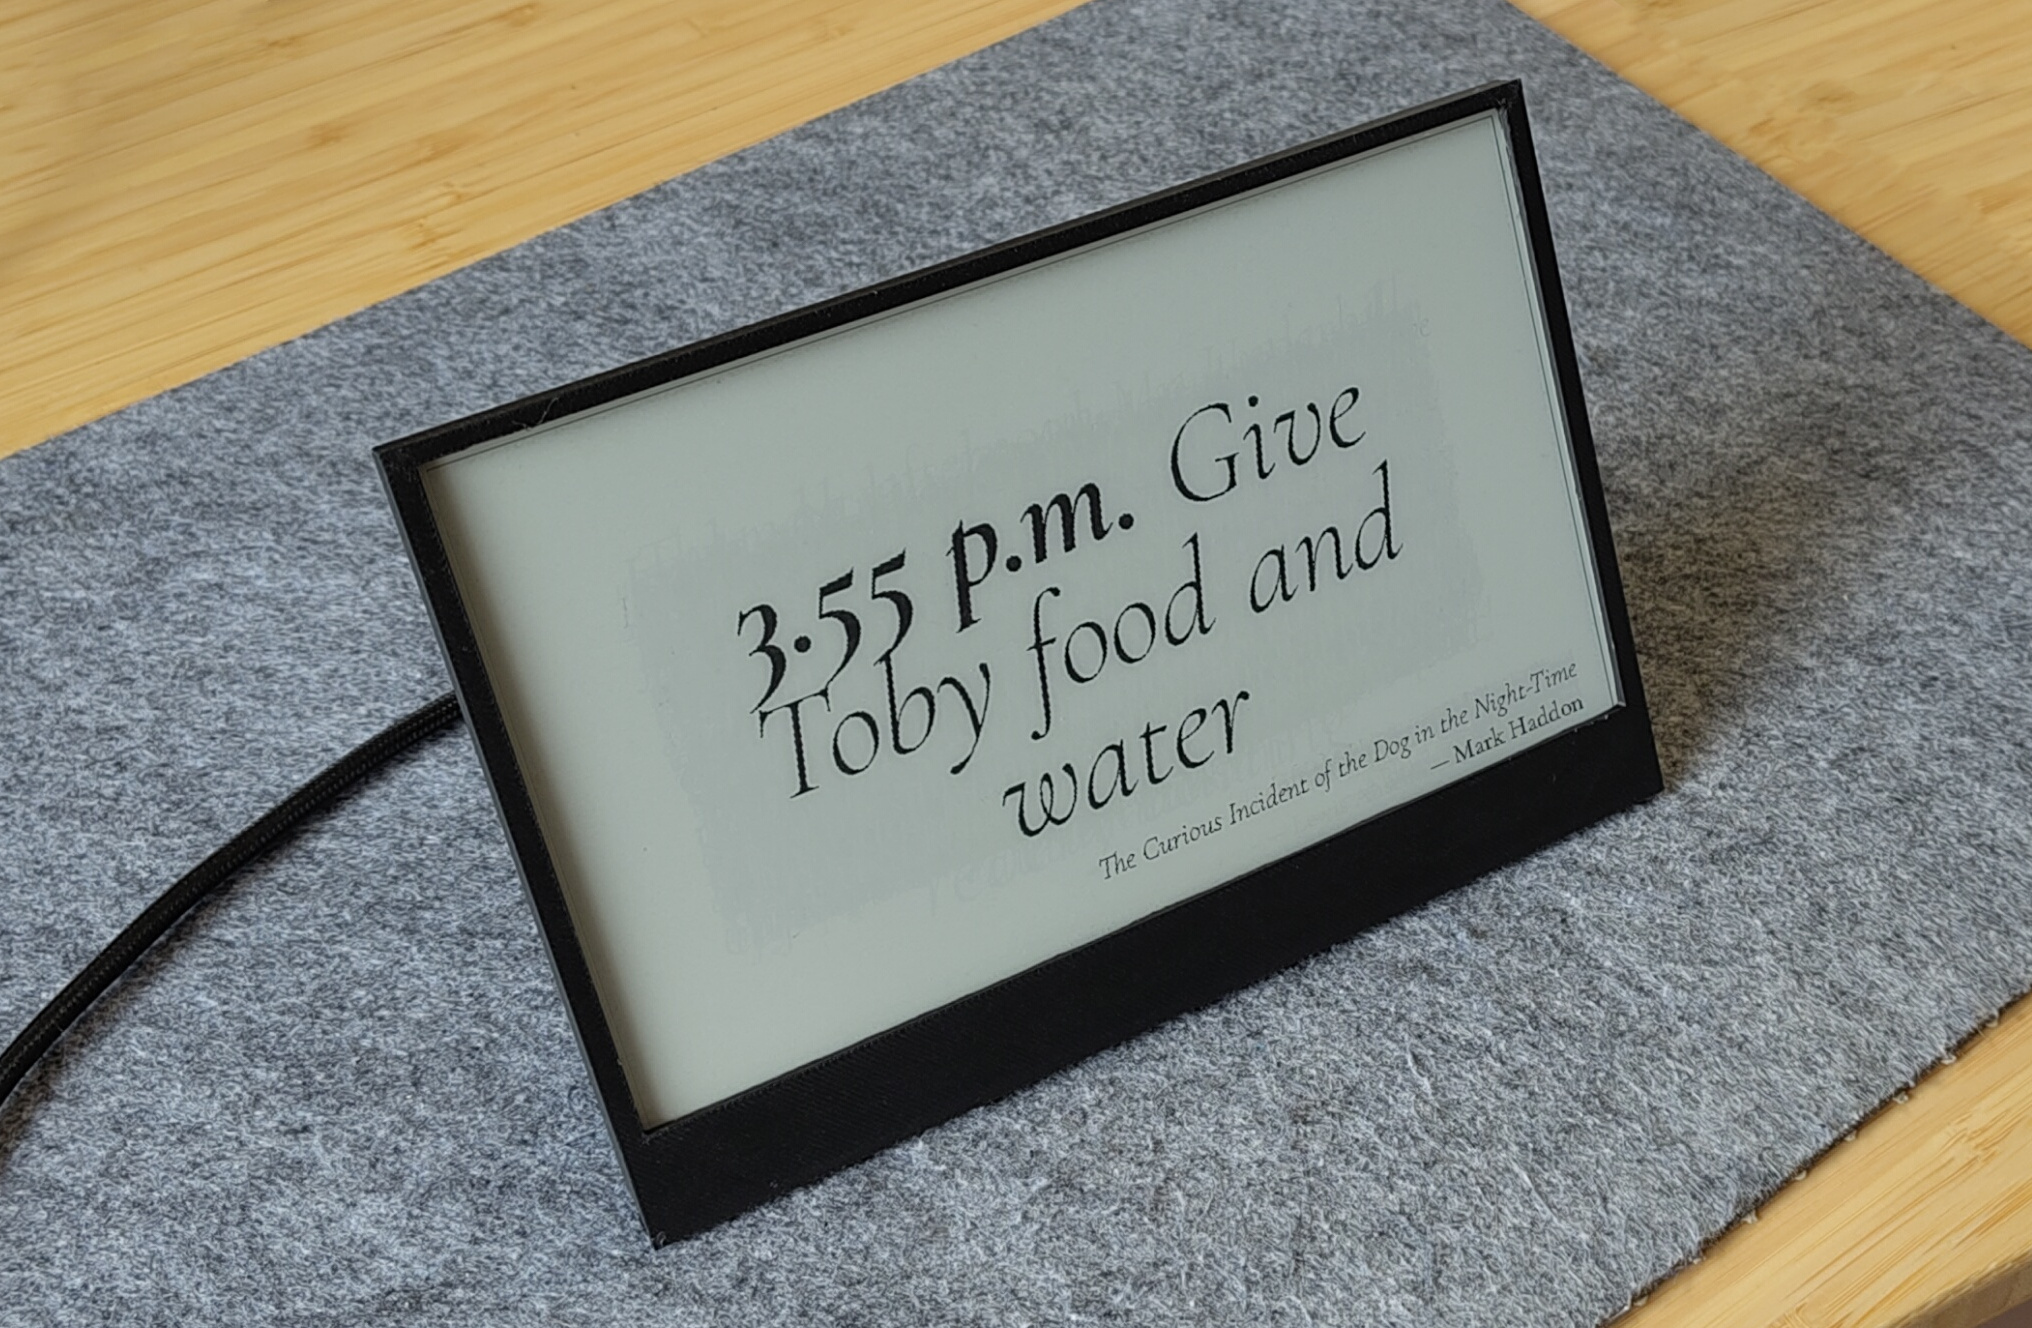
Hello World on our screen.Wonderful! I can now work my software magic and end up with a small Python script which fetches the time-accurate quote, builds a nice-looking image of it, and display it onto the screen. Using cron, I can setup my RPi to run that script every minute, and tada! A clock!
Using cron to run my script every minute.
I can set it up by running crontab -e, and then adding the line
* * * * * cd /home/pi/literature-clock && /home/pi/literature-clock/.venv/bin/python /home/pi/literature-clock/main.py
But what happens if my RPi loses power?
The RPi would shut down, and the currently-displayed quote would stay on the screen.
However, upon powering it up, I’d have to wait for cron job to run again, i.e. up to a whole minute.
Instead, I want my script to run on startup. To do so, we’ll use systemd, leading us to write literature-clock.service.
I place our newly-written .service file at /etc/systemd/system/literature-clock.service, register it, and, and enable it to run at boot.
sudo nano /etc/systemd/system/literature-clock.service # Write the .service
sudo systemctl daemon-reload # Register it
sudo systemctl enable literature-clock.service # Enable it
Test the systemd service
- Ensure the service works with
sudo systemctl start literature-clock.service - Check the service’s status with
systemctl status literature-clock.service
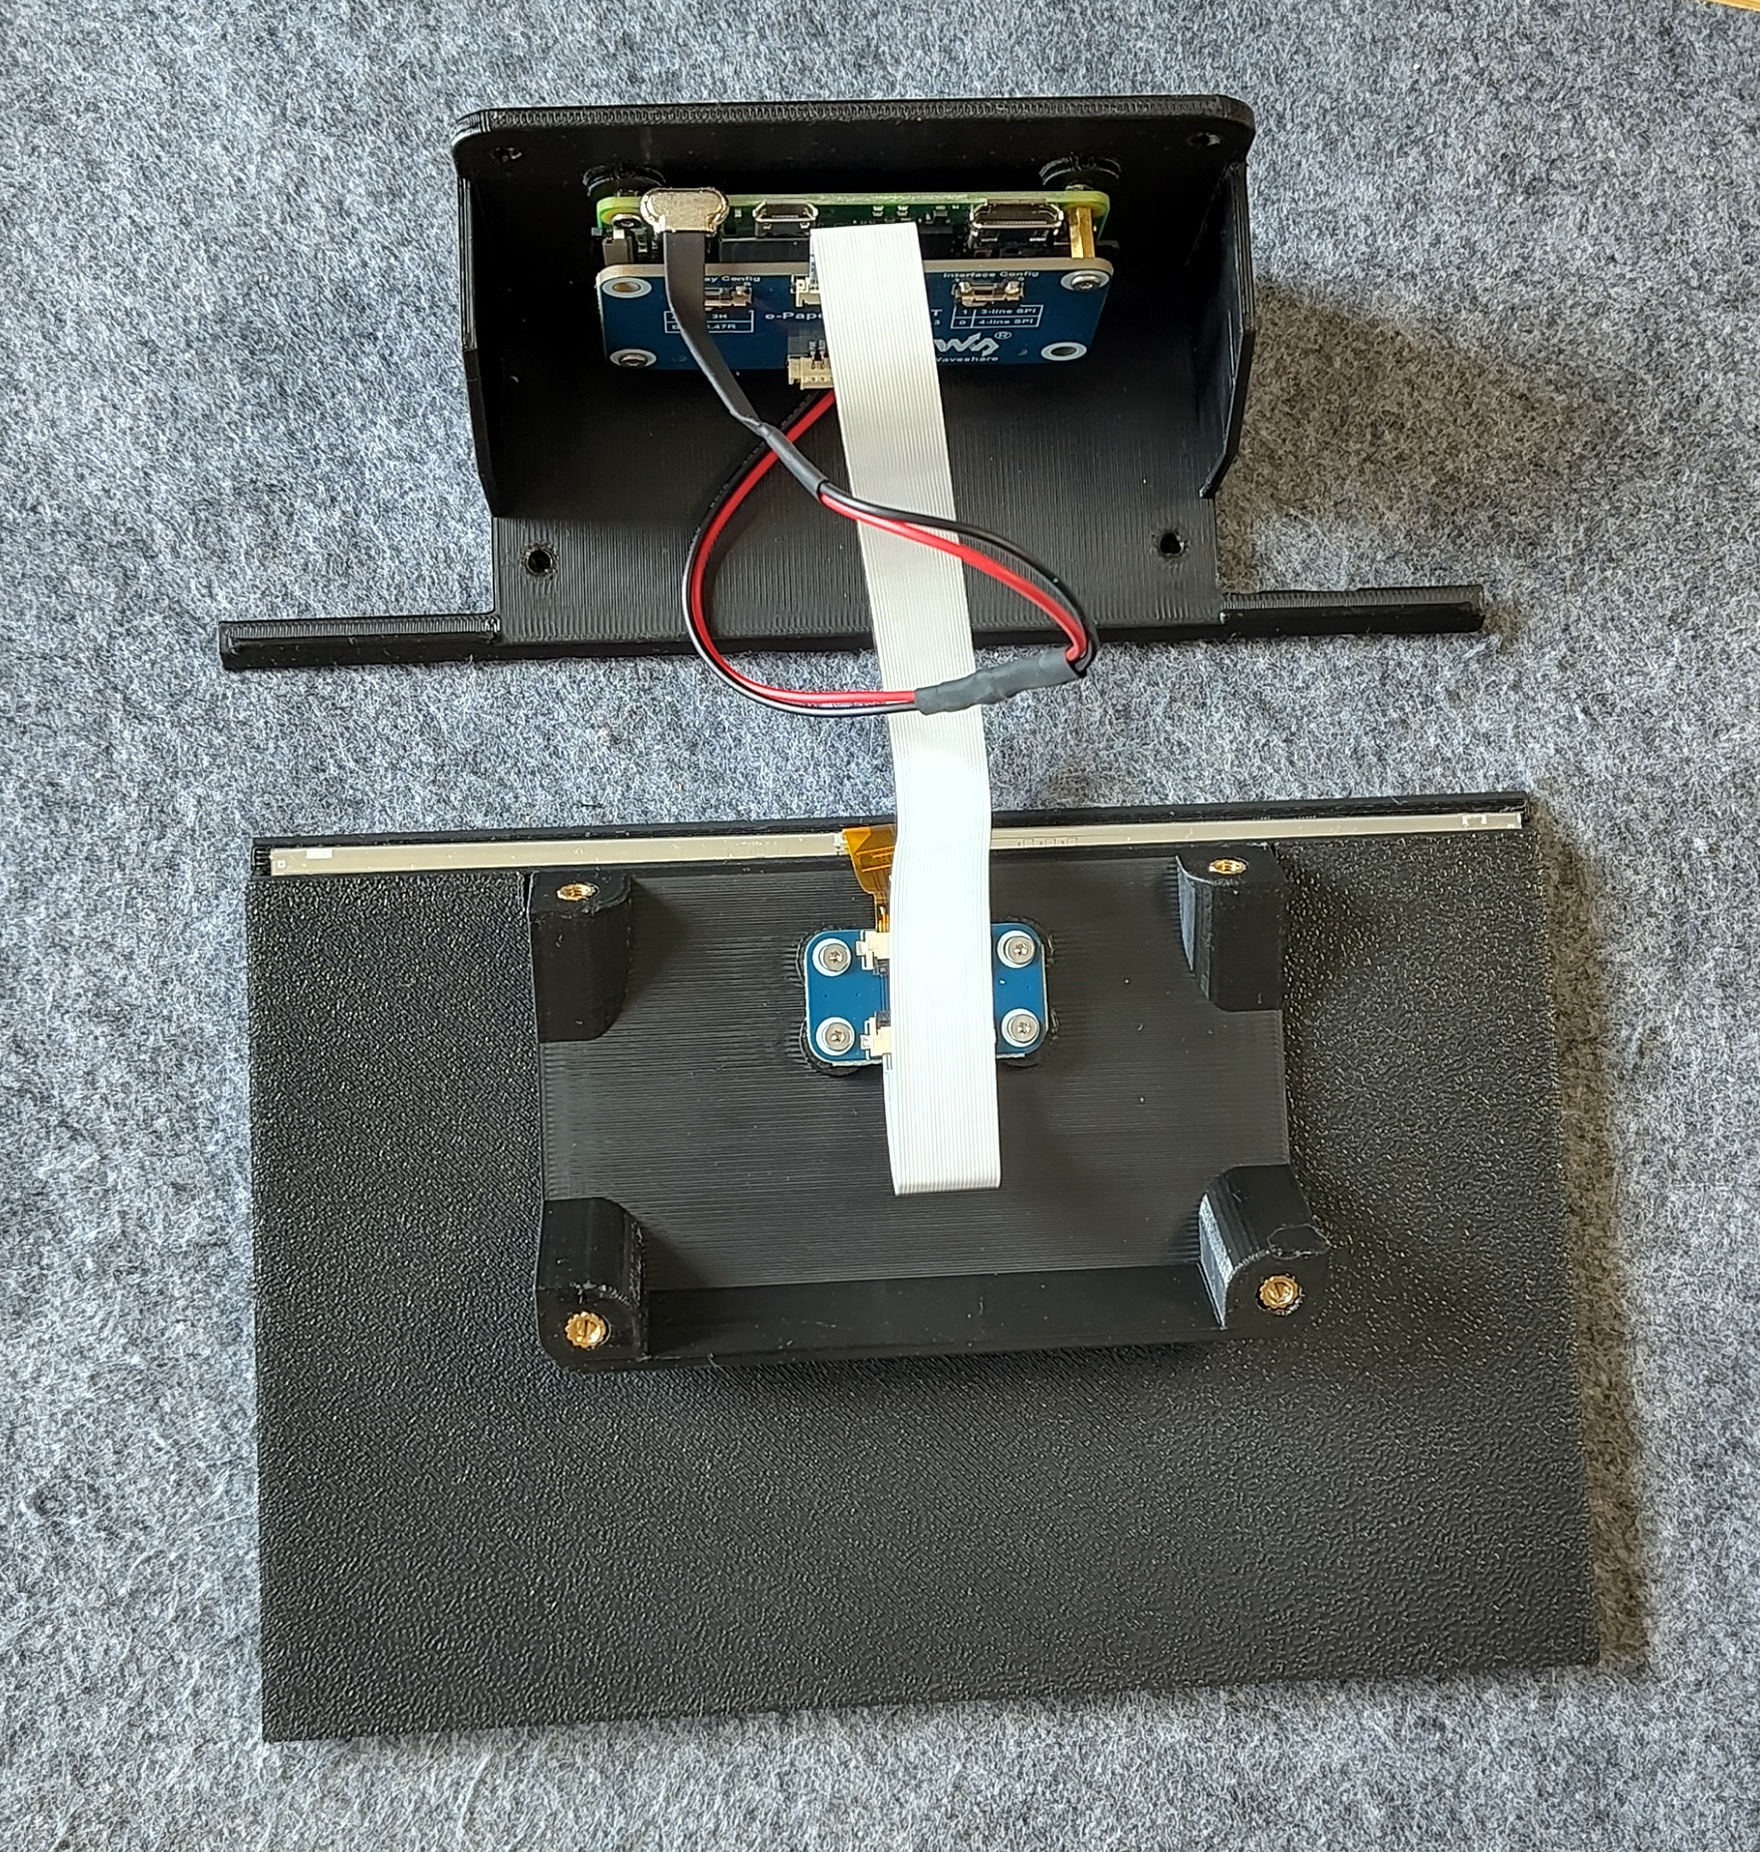
Step 4: House the hardware properly
We now have a working clock – yet fully naked on my desk. I turn to a 3D modelling software – solvespace, as I am a Linux user – to draw what I’d see as a nice-looking housing.2
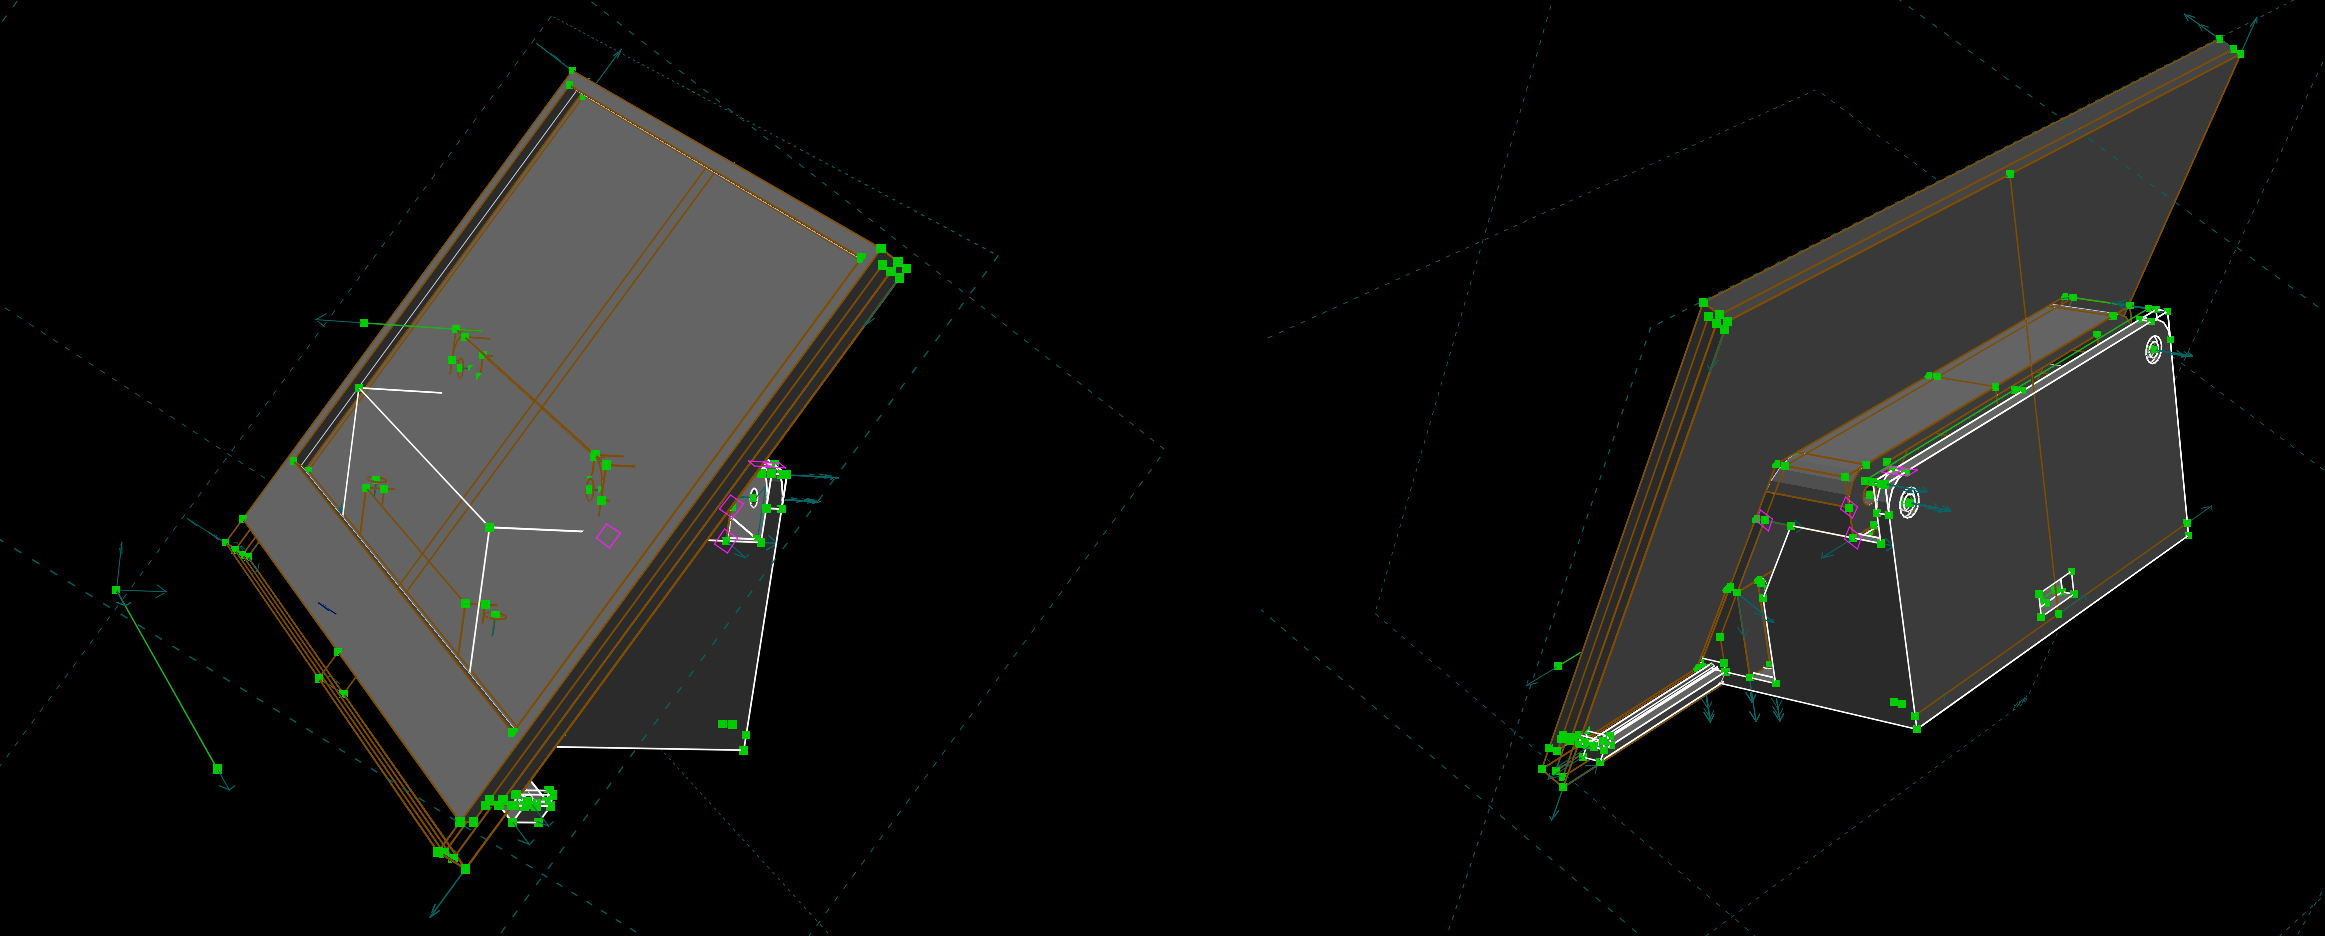
After some 3D-printing, our parts are ready for assembly.
3D printing as a service vs at home
At the start of this project, I didn’t own a 3D printer, leading me to rely on print-as-a-service vendors. The lead time (typically 7-10 days) eventually led me to buy my own 3D printer, to be able to experiment faster.
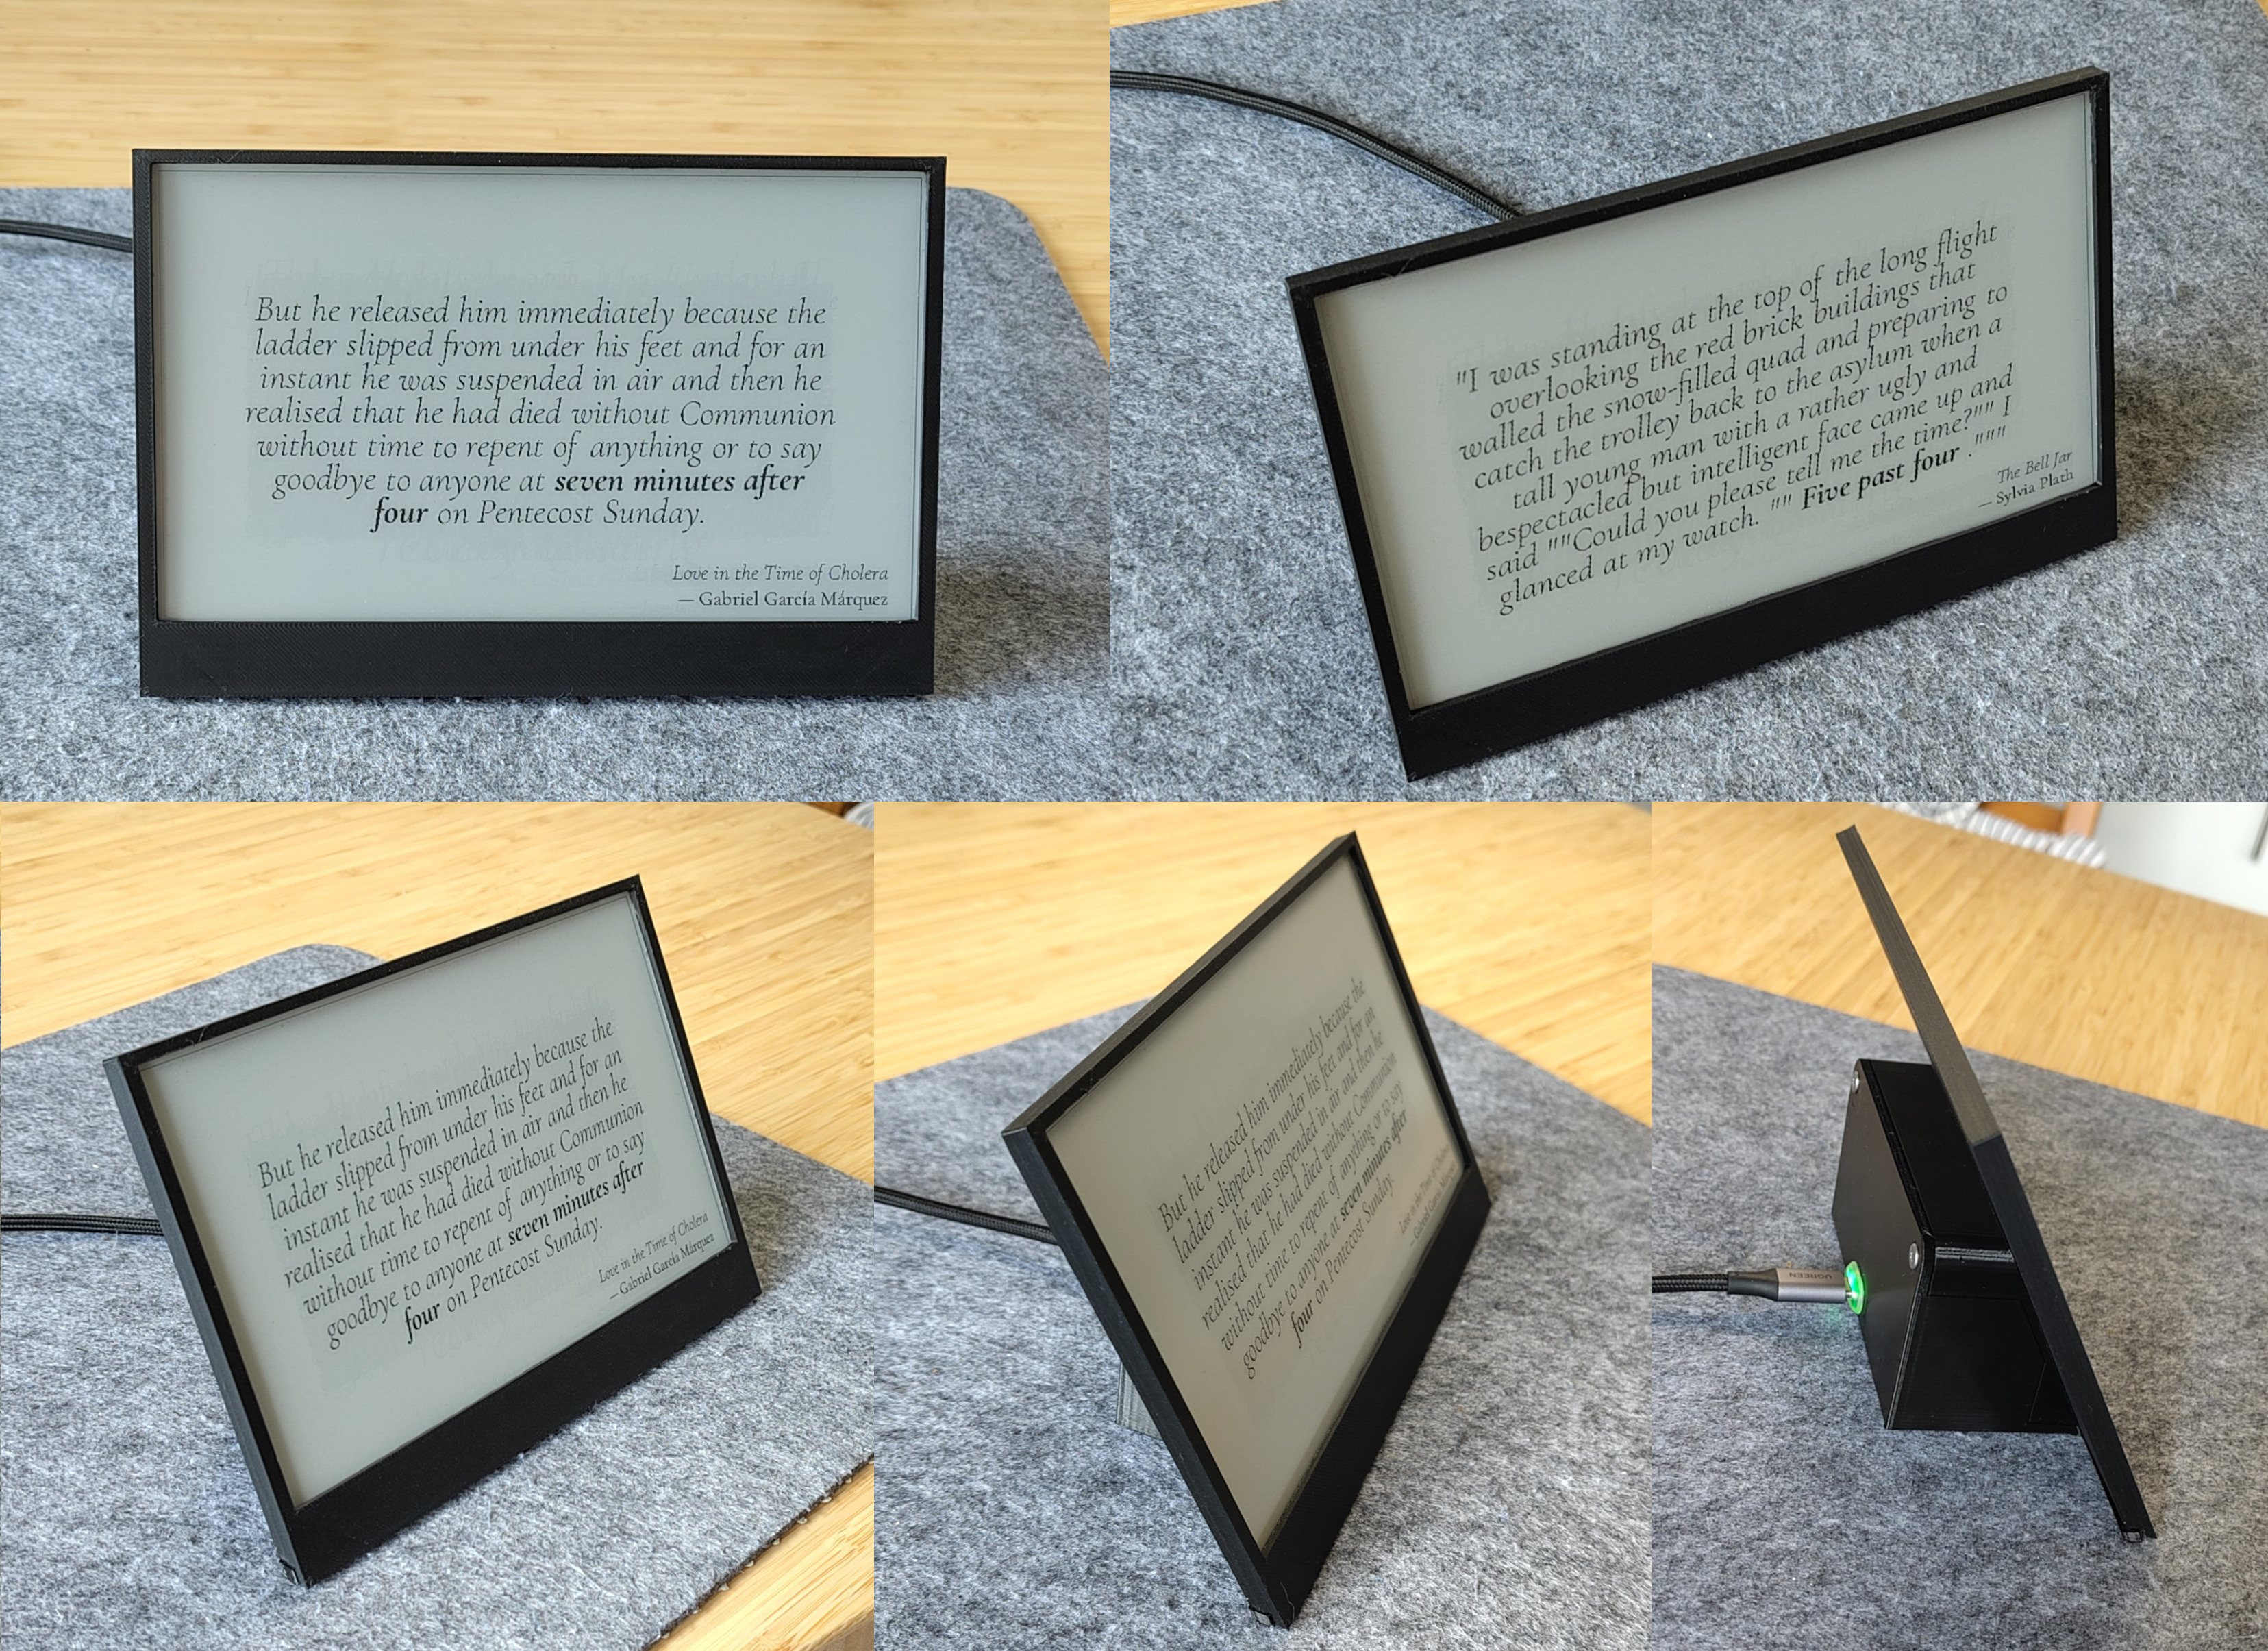
After inserting the threaded inserts – with a soldering iron – and mounting the female-USB-C-to-male-micro-USB port, tada!, our clock is ready !